This past winter in New England, there was only one topic of discussion at any party or gathering: ice dams (“accumulated snow on a sloping roof that melts and flows down the roof, then refreezes, preventing snow from properly draining and resulting in roof leaks,” according to Wikipedia). Specifically the extensive and expensive interior water damage they caused. (As I write, my insurance check is in hand and the contractors are poised to begin repairs.)
All fine for my painted walls. But what about those with wallpaper? Especially vintage wallpaper that cannot be replaced. Here I turned to the Internet. The consensus from several articles: Use bleach. I decided to give it a try.

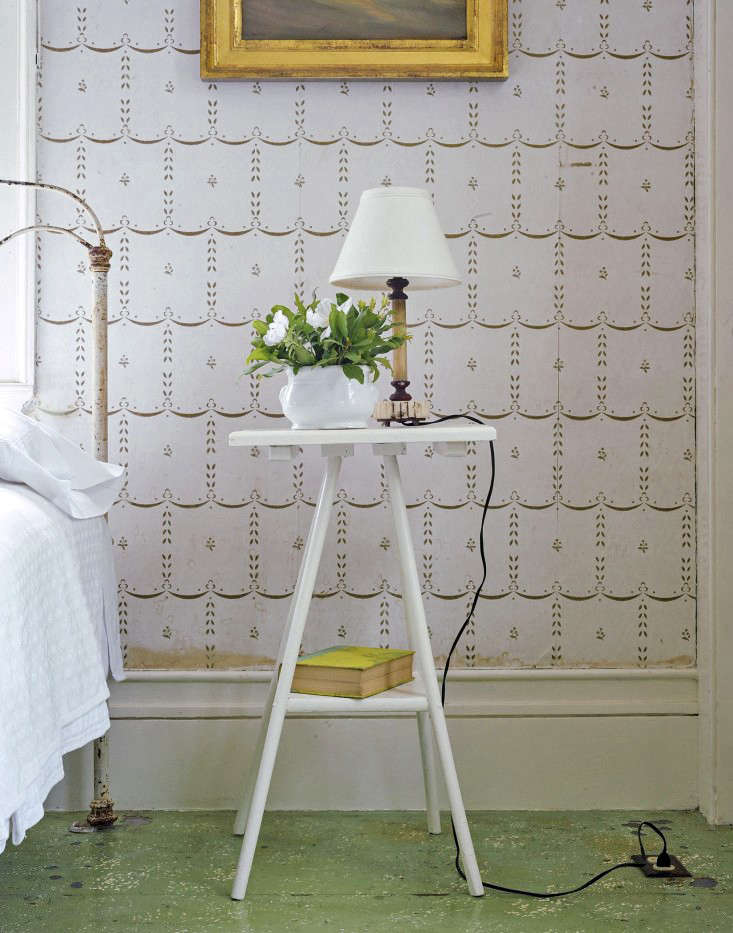
Above: One of my favorite features in the guest bedroom of my summer cottage is the antique cream and gold wallpaper. Photograph by Matthew Williams for Remodelista: A Manual for the Considered Home.

Above: A closeup of my beloved wallpaper shows the effects of age, including water stains near the baseboards. Photograph by Matthew Williams for Remodelista: A Manual for the Considered Home.

Above: This winter’s water damage tipped the balance from “charming patina” and just plain “delerict.” Something had to be done.

Materials:
- Bleach
- Distilled water
- Several rags and/or sponges
- Measuring cup
- Bowl
- Dish detergent
Most “water stains” are not actually caused by the water itself but from the tannins in the wood behind the paper, which dissolve when they come into contact with the water. Often these can be eliminated with a little bleach mixed with distilled water. (For oil and grease stains, try a white eraser.)
One note: Because my wallpaper is so old, contacting the manufacturer was not an option. But the first step in any wallpaper cleaning DIY would typically be to ask the maker for recommended treatments.

Step 1: If your walls are dirty, use a little dish soap mixed with water to gently clean the walls. Be sure to thoroughly squeeze any excess liquid from the cloth so as not to create more stains.

Step 2: Mix one part bleach with two parts water.

Step 3: Warning! Before you start wiping down a whole area, be sure to test a small spot that’s not in plain view. Dip the edge of your sponge into the bleach solution (you may want to wear gloves). Using the edge of the bowl, squeeze out any extra liquid. Then gently dab the stained areas. You can also use a cotton ball or, for small areas, a Q-Tip.

Step 4: Be careful not to apply too much water; you want the stain to disappear, not get worse. After applying the solution, dab with a dry cloth to prevent further staining.

Step 5: Let the bleach solution rest for 5 minutes, then “rinse” or blot again with a wetted rag. Allow your paper to dry thoroughly before applying a second coat on any stubborn stains. (I had to apply the bleach solution twice on those dark stains toward the bottom.)

Above: The results. Still not perfect, especially around the gold areas, where I was loathe to try bleach. But I think we’re back in the realm of a charming patina. Next time I might try some OxiClean.
Want more DIY cleaning solutions? Try:
- Domestic Science Tip: How to Clean a Dishwasher
- Domestic Science Tip: How to Clean a Washing Machine


Have a Question or Comment About This Post?
Join the conversation