You are reading

DIY: Block-Printed Tea Towels, Inspired by Moses Eaton

SearchJoinLogin
Icon - Arrow LeftAn icon we use to indicate a rightwards action. Icon - Arrow RightAn icon we use to indicate a leftwards action. Icon - External LinkAn icon we use to indicate a button link is external. Icon - MessageThe icon we use to represent an email action. Icon - Down ChevronUsed to indicate a dropdown. Icon - CloseUsed to indicate a close action. Icon - Dropdown ArrowUsed to indicate a dropdown. Icon - Location PinUsed to showcase a location on a map. Icon - Zoom OutUsed to indicate a zoom out action on a map. Icon - Zoom InUsed to indicate a zoom in action on a map. Icon - SearchUsed to indicate a search action. Icon - EmailUsed to indicate an emai action. Icon - FacebookFacebooks brand mark for use in social sharing icons. flipboard Icon - InstagramInstagrams brand mark for use in social sharing icons. Icon - PinterestPinterests brand mark for use in social sharing icons. Icon - TwitterTwitters brand mark for use in social sharing icons. Icon - Check MarkA check mark for checkbox buttons.
You are reading

DIY: Block-Printed Tea Towels, Inspired by Moses Eaton

SearchJoinLogin
Advertisement

DIY: Block-Printed Tea Towels, Inspired by Moses Eaton

by Published: June 4, 2024

Block prints are far from new, but they’re certainly having a moment.

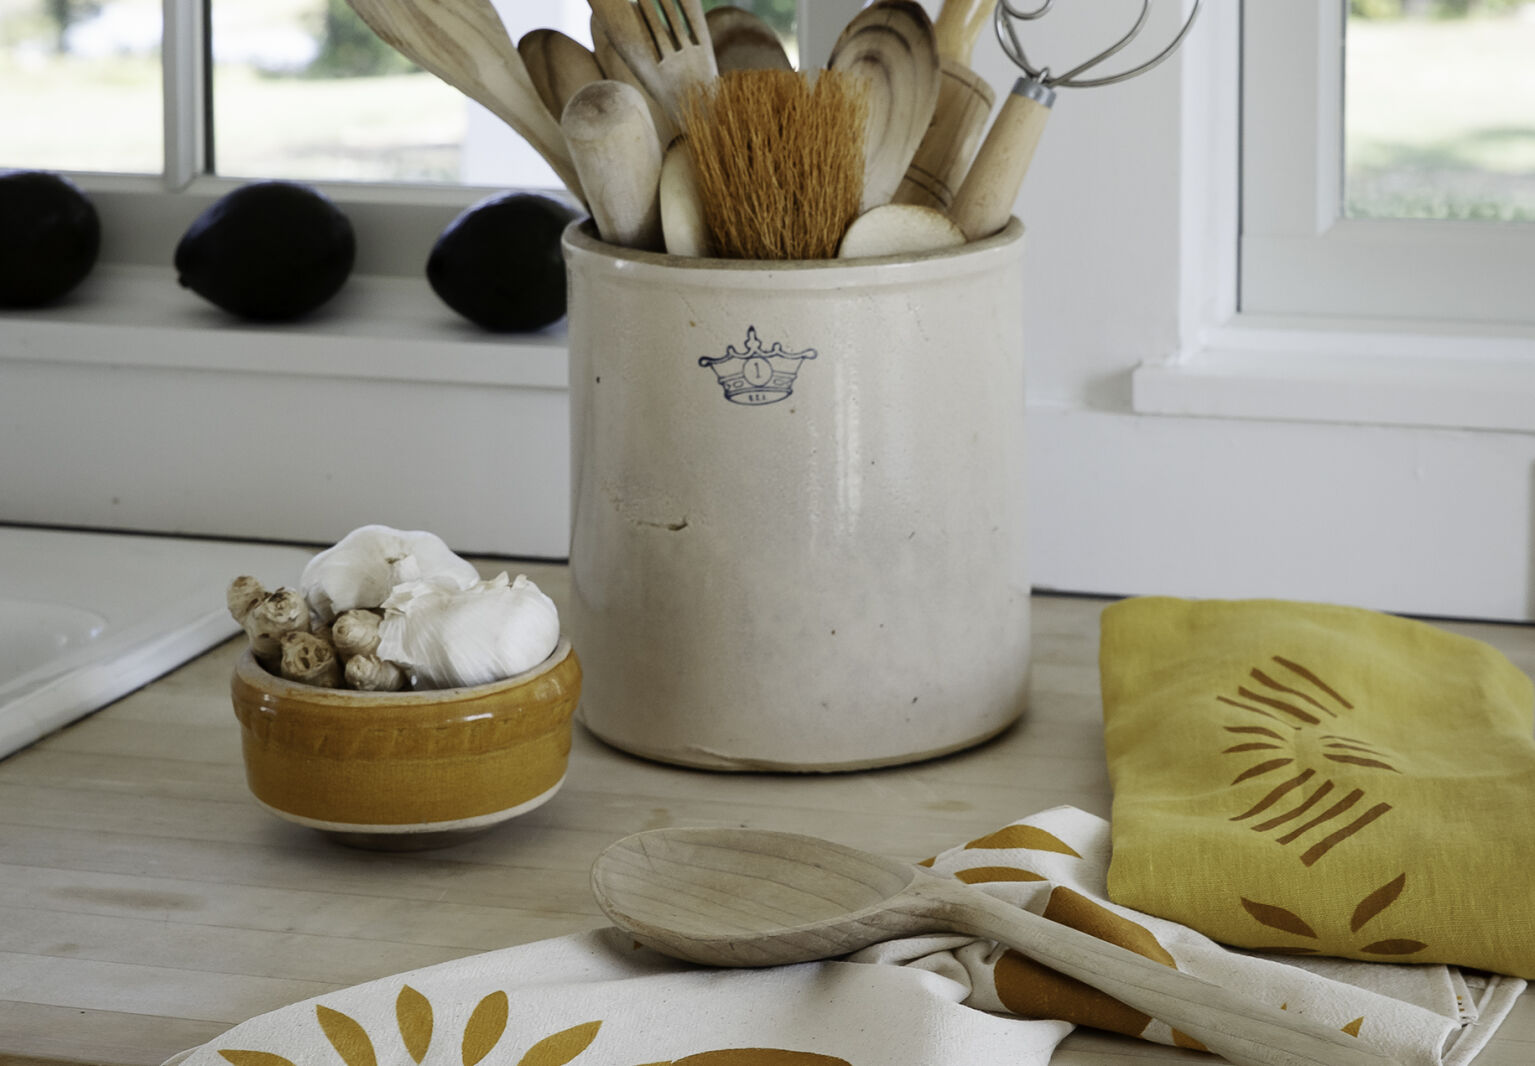
For an old-meets-modern take, take a page out of the summer section of our new(ish) book, Remodelista in Maine. Inspired by classic New England folk artists like Moses Eaton, whose whimsical motifs decorated the walls of many a Northeast farmhouse, our own Justine Hand created a modernized, tone-on-tone block-print tea towel. The designs work on kitchen linens, napkins, lampshades, shams… and make a charming host gift, too.

Here’s Justine’s DIY:

Supplies

  • Cotton or linen tea towel, washed and ironed
  • Masking or painter’s tape
  • Stencil adhesive
  • Moses Eaton stencil (available from mbhistoricdecor.com)
  • Textile paint
  • Shallow dish for paint
  • Large flat-tipped paintbrush or sponge
  • Paper towel
  • Iron

Step 1

lay a towel flat over a protected surface and secure the corners with tape. mak 17
Above: Lay a towel flat over a protected surface and secure the corners with tape. Make sure the fabric is taut. In a well-ventilated work space, spray the reverse side of your stencil with a light coat of adhesive, which will keep the stencil in place while you work and stop paint from running under it. Make sure you cover the whole surface, but do not oversaturate it, as the adhesive may stain the towel. Carefully lay the adhesive side of the stencil onto your towel, pressing around each edge.

Step 2

pour a small amount of paint into the shallow dish. dip only the tip of the bru 18
Above: Pour a small amount of paint into the shallow dish. Dip only the tip of the brush into the pigment and blot it onto a paper towel until the brush is almost dry Holding the brush straight up and down, vigorously tap the fabric within the stencil pattern. Repeat, slowly building up thin layers of paint until you achieve a rich color.

Step 3

gently peel off the stencil. allow the paint to dry thoroughly. heat set with a 19
Above: Gently peel off the stencil. Allow the paint to dry thoroughly. Heat set with an iron according to the paint instructions, and wash the towel before use.

The Finished Product

play with patterns and colors: high contrast or tone on tone. 20
Above: Play with patterns and colors: high-contrast or tone on tone.

For more, see pg. 58-59 of Remodelista in Maine (and page through for DIY projects for every season).

Plus, more DIYs from our archives:

(Visited 8,985 times, 1 visits today)
You need to login or register to view and manage your bookmarks.

Frequently asked questions

The materials required for DIY modern block print tea towels are fabric (preferably 100% cotton), wooden block stamp, fabric paint, textile medium, foam brush, ruler, pencil, paper plate, iron, and tea towels.

Have a Question or Comment About This Post?

Join the conversation (0)