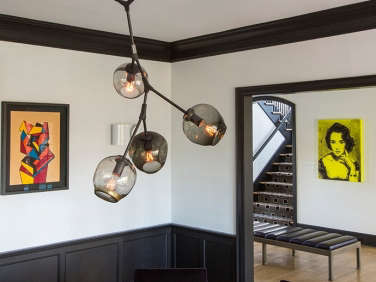
Whether you live in a state-of-the-art loft or a tiny fixer-upper, chances are you’d like to have a Lindsey Adelman light dangling overhead. No other lighting designer has so quickly become a household name–or so gracefully straddled the worlds of high design and DIY simultaneously.
In the remodeling world, Lindsey Adelman’s You Make It pendant lights–free plans for versions of her lights made from off-the-shelf parts– have a cult status: you can spot completed versions in 9 out of 10 house blogs. And yet we hear that assembling them takes perseverance. In response to our request for a first-timer’s light, Adelman came up with this new Hanging Pendant, now making its debut. She swears (just about) anyone can tackle the project. Have a look at her work at Lindsey Adelman Studio and you, too, will be ready to start wiring.
Photographs by Lindsey Adelman Studio.

Above: Presenting the Lindsey Adelman DIY Hanging Pendant, ideal for hanging over a small kitchen table or in a hallway or bathroom. And you get to say you made it yourself.

Above: The light hangs from a twisted cloth cord and is made from hardware store parts. Venerable New York store Grand Brass Lamp Parts sells a You Make Hanging Pendant Kit that contains all of the parts for $57; you can also source the parts individually from Grand Brass and others. (N.B.: The example shown here is in brass and steel; Adelman prefers it in all brass, which is what the kit offers.)

Above: The light angle is adjustable by a brass swivel at its elbow.
Ready to get started? Kevin Quale, a member of Lindsey Adelman’s design studio, assembled the Hanging Pendant and documented his progress along the way.

Above: All of the parts: the kit comes with 18 different items, including brass arms, socket cup, and swivel, and 12 feet of cloth-covered twisted electrical cord. To begin assembly, you need the following tools: a wire stripper, small Phillips head screwdriver, small slotted screwdriver, pliers (optional), and Loctite, a sealant.

Above: Assemblage underway: Adelman advises beginning by arranging all the pieces in place. Diagrams and detailed instructions are available for the taking at Lindsey Adelman Studio. “Please note that while it is possible to build the fixture yourself, it is much more enjoyable with a partner,” says Adelman.

Above: Loctite adhesive is used to secure the juncture points.

Above: Be prepared to do some wiring and splicing.

Above: The light hangs from cloth-covered wire cord (cut to whatever length is desired) and can be hard-wired into a ceiling or attached to a plug that you wire yourself. Adelman provides a detailed plug diagram and instructions.

Above: The completed Hanging Pendant Light.

Above: Quale installed his work above his kitchen table. Please send us photos of your own finished lights in room settings.
The Hanging Pendant is the fifth DIY project from Lindsey Adelman. Have a look at her other You Make It lights here.
We’re longstanding Lindsey Adelman fans: See Julie’s 2009 post on her Handblown Glass Pendant Lights and our recent High/Low post on her Bronze Chandelier. Also check out the Lindsey Adelman Branching Bubble Chandelier in our post on a Whimsical Family Loft in Brooklyn, Whale Wallpaper Included. Looking for Outdoor Lighting Ideas? Go to Gardenista.


Have a Question or Comment About This Post?
Join the conversation